Churro Cheesecake: A Fusion of Delightful Flavors
Welcome to a culinary adventure where two beloved desserts unite to create a symphony of sweet indulgence – the Churro Cheesecake. This delightful creation combines the crispy, cinnamon-infused allure of churros with the creamy richness of cheesecake, delivering a taste that’s nothing short of extraordinary.
Unveiling the Magic
As the culinary world continues to innovate, the Churro Cheesecake has emerged as a star, captivating taste buds with its unique blend of textures and flavors. Imagine the golden, sugary crunch of churros meeting the velvety smoothness of cheesecake in each decadent bite.
Popularity and Pizzazz
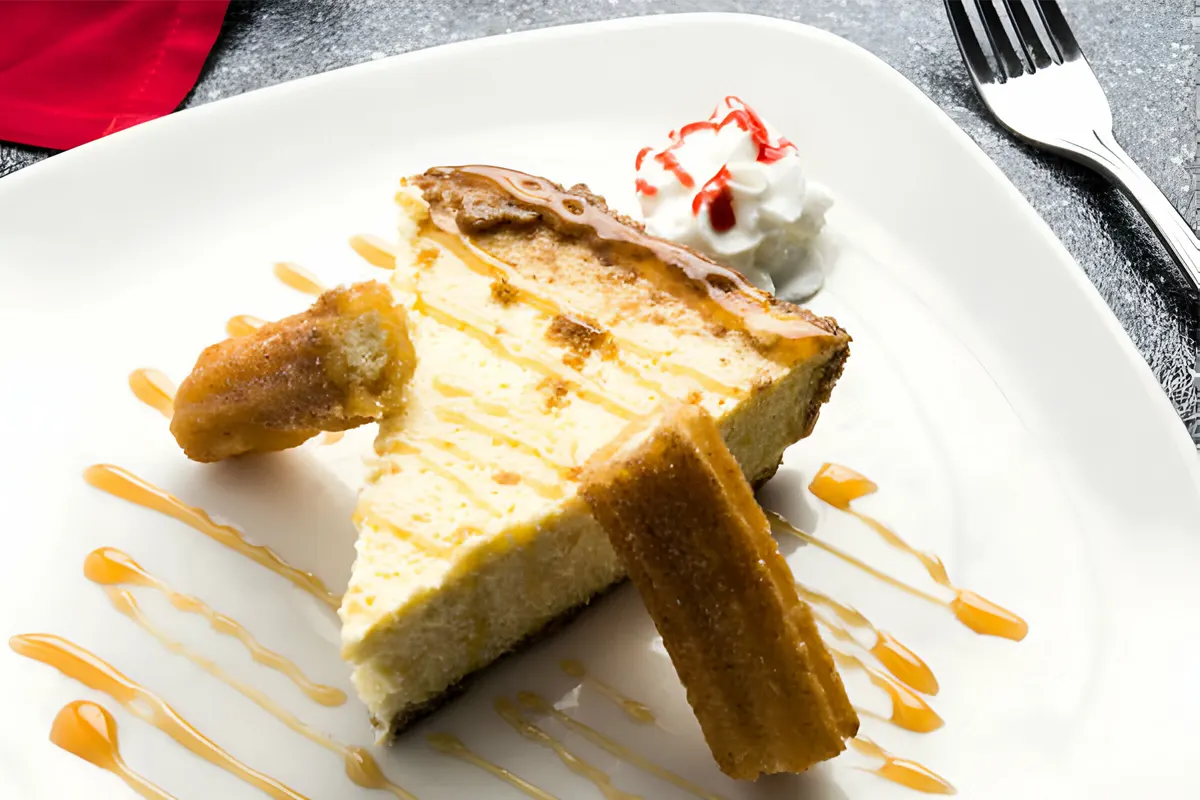
This dessert sensation has quickly gained popularity, becoming a favorite among both churro enthusiasts and cheesecake aficionados. The appeal lies not only in its heavenly taste but also in the visual spectacle it presents—a golden-brown churro crust cradling a luscious cheesecake filling, topped with a dusting of cinnamon magic.
Join the Churro Cheesecake Craze
Whether you’re a seasoned baker or a kitchen novice, this article will guide you through the step-by-step process of creating your own Churro Cheesecake masterpiece. Get ready to embark on a culinary journey that promises to elevate your dessert game and impress your family, friends, or any lucky taste tester.
Let’s dive into the delightful world of Churro Cheesecake, where each layer tells a story of flavor harmony and dessert bliss.
2. Ingredients
Before we embark on creating this delectable Churro Cheesecake, let’s gather the key ingredients that will make this dessert a true masterpiece. Check your kitchen inventory and make a quick trip to the store if needed. Here’s what you’ll need:
Churro Crust Ingredients:
- 2 cups of crushed cinnamon graham crackers
- For that irresistible churro flavor.
- 1/2 cup of melted unsalted butter
- To bind the crust together and add richness.
- 1/4 cup of granulated sugar
- For the perfect sweetness in every bite.
- 1 teaspoon of ground cinnamon
- Enhancing the churro essence.
Cheesecake Filling Ingredients:
- 4 packages (32 oz) of cream cheese, softened
- The creamy foundation of your cheesecake.
- 1 cup of granulated sugar
- Sweetening the deal.
- 1 teaspoon of vanilla extract
- Adding a touch of vanilla goodness.
- 4 large eggs
- Binding the filling together.
Additional Toppings and Garnishes:
- Cinnamon sugar mix for dusting
- Bringing that classic churro touch.
- Whipped cream or vanilla ice cream (optional)
- For an extra layer of indulgence.
Now that we have our ingredients ready, let’s move on to the essential kitchen tools required for crafting this sensational Churro Cheesecake.
Pro Tip: If you’re a fan of unique bread recipes, check out our special events bread recipe for another delightful baking experience.
3. Equipment Needed
To bring this Churro Cheesecake to life, you’ll need a few essential kitchen tools. Ensure you have the following equipment ready before you start:
For the Churro Crust:
- 9-inch Springform Pan
- The key to achieving that perfect cake shape.
- Mixing Bowl
- For combining the crushed graham crackers, melted butter, sugar, and cinnamon.
- Measuring Cups and Spoons
- To ensure precision in your measurements.
- Spatula
- Handy for smoothing and pressing the crust into the pan.
For the Cheesecake Filling:
- Electric Mixer
- To achieve a smooth and creamy consistency for the cheesecake filling.
- Large Mixing Bowl
- For blending the cream cheese, sugar, vanilla extract, and eggs.
- Rubber Spatula
- Essential for scraping down the sides of the bowl and ensuring thorough mixing.
Baking Essentials:
- Oven
- Preheat it to the recommended temperature for baking.
- Baking Sheet
- Placing it under the springform pan can help catch any potential leaks.
- Parchment Paper
- For lining the bottom of the springform pan to prevent sticking.
Optional, but Recommended:
- Food Processor
- Makes crushing the graham crackers for the crust a breeze.
- Cooling Rack
- Allows the cheesecake to cool evenly after baking.
Now that you have your ingredients and equipment in place, it’s time to dive into the first step of creating your Churro Cheesecake—the irresistible Churro Crust.
Pro Tip: If you’re in the mood for another unique cake experience, check out our Bluey Cake recipe for a whimsical and delicious treat.
4. Churro Crust
The foundation of our Churro Cheesecake is the delightful churro-infused crust. Follow these steps to create a base that will complement the creamy cheesecake filling perfectly.
1: Preparing the Graham Cracker Base
Begin by crushing 2 cups of cinnamon graham crackers. A food processor makes this task quick and efficient, resulting in fine crumbs.
2: Mixing with Butter and Sugar
- In a mixing bowl, combine the crushed graham crackers with 1/2 cup of melted unsalted butter.
- Add 1/4 cup of granulated sugar and 1 teaspoon of ground cinnamon to the mixture.
- Use a spatula to thoroughly mix the ingredients until you achieve a crumbly texture.
3: Pressing into the Pan
- Preheat your oven to the recommended temperature.
- Grease the bottom of a 9-inch springform pan and line it with parchment paper.
- Transfer the churro crust mixture into the pan and use the back of a spoon or spatula to press it firmly into an even layer, covering the bottom.
4: Baking the Churro Crust
- Place the pan on a baking sheet and bake the crust in the preheated oven for the specified time.
- Once baked, allow the crust to cool while you prepare the cheesecake filling.
Pro Tip:
For an additional layer of churro flavor, consider sprinkling a bit more cinnamon sugar on the crust before baking.
Now that our churro crust is ready, it’s time to move on to the heart of the Churro Cheesecake—the creamy and indulgent Cheesecake Filling.
Pro Tip: Explore our Italian Hangover Cake for another delightful and unique dessert experience.
5. Cheesecake Filling
Now that we’ve laid the churro-infused groundwork with our delectable crust, it’s time to focus on the star of the show—the rich and creamy cheesecake filling.
1: Preparing the Cream Cheese
- In a large mixing bowl, ensure that the 4 packages (32 oz) of cream cheese are softened. This is crucial for achieving a smooth and lump-free filling.
- Using an electric mixer, beat the cream cheese until it becomes light and fluffy.
2: Sweetening the Deal
- Gradually add 1 cup of granulated sugar to the whipped cream cheese.
- Continue beating until the sugar is fully incorporated and the mixture is velvety in texture.
3: Adding Vanilla Essence
- Introduce 1 teaspoon of vanilla extract to the bowl.
- Beat the mixture once again, ensuring that the vanilla enhances the overall flavor profile.
4: Incorporating the Eggs
- Add the 4 large eggs, one at a time, beating well after each addition.
- Ensure that the eggs are fully integrated into the filling, creating a creamy and cohesive texture.
Pro Tip:
Scrape down the sides of the bowl with a rubber spatula throughout the process to guarantee an even blend.
Now that our cheesecake filling is prepared to perfection, let’s move on to assembling the layers and creating a dessert masterpiece.
Pro Tip: If you enjoyed exploring unique cake recipes, don’t miss our Cocomelon Cake for a whimsical and delicious treat.
6. Assembly
With the Churro Crust and Cheesecake Filling prepared, it’s time to bring them together in a harmonious union. Follow these steps to assemble your Churro Cheesecake with finesse.
1: Preparing the Pan
- Ensure that your churro crust has cooled completely.
- If necessary, run a knife along the edges of the crust to loosen it from the sides of the springform pan.
2: Layering the Churro Crust
- Carefully spoon the prepared cheesecake filling onto the churro crust in the springform pan.
- Use a spatula to spread the filling evenly, ensuring it reaches the edges of the crust.
3: Achieving a Smooth Surface
- Gently tap the pan on the counter to remove any air bubbles.
- Smooth the top of the cheesecake filling with a spatula for a polished finish.
4: The Churro Swirl
- For an extra touch of churro charm, consider creating a cinnamon swirl on the surface.
- Use a knife or toothpick to gently swirl cinnamon sugar on top of the cheesecake.
Pro Tip:
Don’t overdo the swirl – a subtle touch adds visual appeal without compromising the smooth texture of the cheesecake.
Now that your Churro Cheesecake is beautifully assembled, it’s time to delve into the baking process.
Pro Tip: If you’re a fan of creative cake designs, check out our Dinosaur Cake for inspiration.
7. Baking Process
Now that your Churro Cheesecake is impeccably assembled, it’s ready to undergo the transformative process of baking. Follow these steps to ensure a perfectly baked and golden-brown masterpiece.
1: Preheating the Oven
- Preheat your oven to the recommended temperature.
- Place a baking sheet on the lower rack to catch any potential drips.
2: Baking Time
- Carefully place the assembled Churro Cheesecake on the middle rack of the preheated oven.
- Bake according to the specified time in your recipe.
3: Checking for Doneness
- Keep an eye on the cheesecake towards the end of the baking time. The edges should be set, and the center slightly jiggly.
- A toothpick inserted into the center should come out with a few moist crumbs, but not wet batter.
4: Cooling the Cheesecake
- Once baked to perfection, turn off the oven and crack the oven door.
- Allow the cheesecake to cool gradually in the oven for about an hour before transferring it to a cooling rack.
Pro Tip:
Resist the temptation to open the oven door frequently during baking to prevent sudden temperature changes that may lead to cracks in the cheesecake.
With the baking process complete, our Churro Cheesecake is one step closer to being a reality. Next, we’ll explore the delightful world of toppings and garnishes.
Pro Tip: For another delightful frozen treat, explore our Strawberry Shortcake Ice Cream recipe.
8. Toppings and Garnishes
Elevate your Churro Cheesecake to new heights with the perfect toppings and garnishes. These final touches will not only enhance the visual appeal but also add extra layers of flavor to your culinary masterpiece.
1: Cinnamon Sugar Dusting
- Prepare a mixture of cinnamon and sugar.
- Lightly dust the top of your Churro Cheesecake with this enchanting blend for that classic churro touch.
2: Whipped Cream or Ice Cream
- For an indulgent serving experience, consider topping each slice with a dollop of freshly whipped cream or a scoop of vanilla ice cream.
- The cool and creamy contrast complements the richness of the cheesecake.
3: Creative Presentation
- Arrange additional elements, such as mint leaves, fresh berries, or a drizzle of caramel sauce, for an artistic and mouthwatering presentation.
- Let your creativity shine as you decorate each slice.
Pro Tip:
Consider creating a toppings station when serving the Churro Cheesecake, allowing your guests to customize their slices with their favorite toppings.
With your Churro Cheesecake now adorned with delightful toppings, it’s time to explore the best practices for storing and serving this delectable dessert.
Pro Tip: If you enjoy the combination of strawberries and cake, don’t miss our Strawberry Shortcake Ice Cream recipe for a refreshing twist.
9. Storage and Serving
Now that your Churro Cheesecake is a visual and flavorful masterpiece, it’s crucial to know the best practices for storage and serving to ensure the longevity of its deliciousness.
1: Proper Storage
- Once the Churro Cheesecake has cooled completely, cover it securely with plastic wrap.
- Store it in the refrigerator for optimal freshness.
- Consume within a few days for the best taste and texture.
2: Bringing to Room Temperature
- Before serving, allow the cheesecake to come to room temperature for about 30 minutes.
- This helps in enhancing the flavors and achieving the perfect, creamy consistency.
3: Slicing for Serving
- Use a sharp, clean knife to slice through the Churro Cheesecake.
- Dip the knife in hot water between slices for a cleaner cut.
Pro Tip:
For a flawless presentation, wipe the knife with a damp cloth after each cut to maintain clean edges.
Now that you know the secrets to storing and serving your Churro Cheesecake, let’s explore some exciting variations to customize this dessert masterpiece.
Pro Tip: If you’re in the mood for another frozen delight, explore our Strawberry Shortcake Ice Cream recipe for a refreshing treat.
10. Variations
While the classic Churro Cheesecake is a crowd-pleaser, there’s always room for creativity and personalization. Explore these variations to put your own unique spin on this delightful dessert.
1: Chocolate Drizzle
- Melt your favorite chocolate and drizzle it over the Churro Cheesecake for a decadent twist.
- Consider using dark, milk, or white chocolate based on your preference.
2: Nutty Crunch
- Add a layer of crushed nuts, such as almonds or pecans, to the churro crust for a delightful crunch.
- The nutty flavor complements the sweetness of the cheesecake.
3: Fruity Swirls
- Incorporate fruit compote or puree into the cheesecake filling for a burst of fruity goodness.
- Raspberry, strawberry, or mango swirls add a refreshing element.
4: Caramel Infusion
- Create a caramel sauce and swirl it into the cheesecake filling for a rich and gooey surprise.
- Top with additional caramel drizzle for extra indulgence.
Pro Tip:
Feel free to combine variations to create your own signature Churro Cheesecake masterpiece. Experiment with different flavors and textures to suit your taste.
With these variations, your Churro Cheesecake becomes a canvas for culinary innovation. Now, let’s address any lingering questions with a comprehensive FAQ section.
Pro Tip: If you’re a fan of unique frozen treats, explore our Strawberry Shortcake Ice Cream recipe for a delightful twist on a classic.
11. FAQs (Frequently Asked Questions)
As you embark on your Churro Cheesecake journey, here are some common questions and answers to ensure a smooth and successful baking experience.
Q1: Can I use store-bought graham cracker crust?
Yes, you can use a pre-made graham cracker crust if you’re short on time. However, preparing the churro-infused crust from scratch adds a special touch to the overall flavor.
Q2: Can I freeze Churro Cheesecake?
While it’s best enjoyed fresh, you can freeze Churro Cheesecake for later consumption. Ensure it’s tightly wrapped in plastic wrap and stored in an airtight container.
Q3: How do I prevent cracks in my cheesecake?
To minimize the risk of cracks, avoid overmixing the batter, and bake the cheesecake in a water bath. Gradual cooling in the turned-off oven also helps prevent cracks.
Q4: Can I make mini Churro Cheesecakes?
Absolutely! Adjust the baking time for smaller portions, and consider using a muffin tin or mini springform pans for individual servings.
Q5: Can I use a different cream cheese brand?
Yes, you can use your preferred brand of cream cheese. Ensure it’s softened for a smooth and lump-free filling.
Pro Tip:
Feel free to experiment with different brands and types of cream cheese to find the one that suits your taste preferences.
With these FAQs addressed, you’re well-equipped to create a flawless Churro Cheesecake. Now, let’s wrap up our culinary journey with a heartfelt conclusion.
Pro Tip: Explore our Dinosaur Cake for a whimsical dessert that’s perfect for special occasions.
12. Conclusion
Congratulations on mastering the art of crafting the irresistible Churro Cheesecake! With its golden churro crust, velvety cream cheese filling, and enchanting toppings, this dessert is bound to leave a lasting impression on your taste buds and those lucky enough to enjoy it.
As you embark on your Churro Cheesecake adventure, remember that culinary creativity knows no bounds. Feel free to experiment with variations, toppings, and presentations to make this recipe uniquely yours.
The journey from preparing the churro crust to perfecting the cheesecake filling is a testament to your culinary prowess. Share your Churro Cheesecake creation with friends and family, and don’t forget to capture the moment – because every slice tells a story of flavor harmony and dessert bliss.
Thank you for joining us on this delightful culinary journey. For more inspiring recipes and creative baking endeavors, explore the diverse array of options on RecipeStrip.
Happy baking, and may your kitchen be filled with the sweet aroma of success!
I every time emailed this blog post page to all my contacts,
because if like to read it then my friends will too.
I go to see each day some web pages and sites to read posts, except this webpage
provides feature based posts.