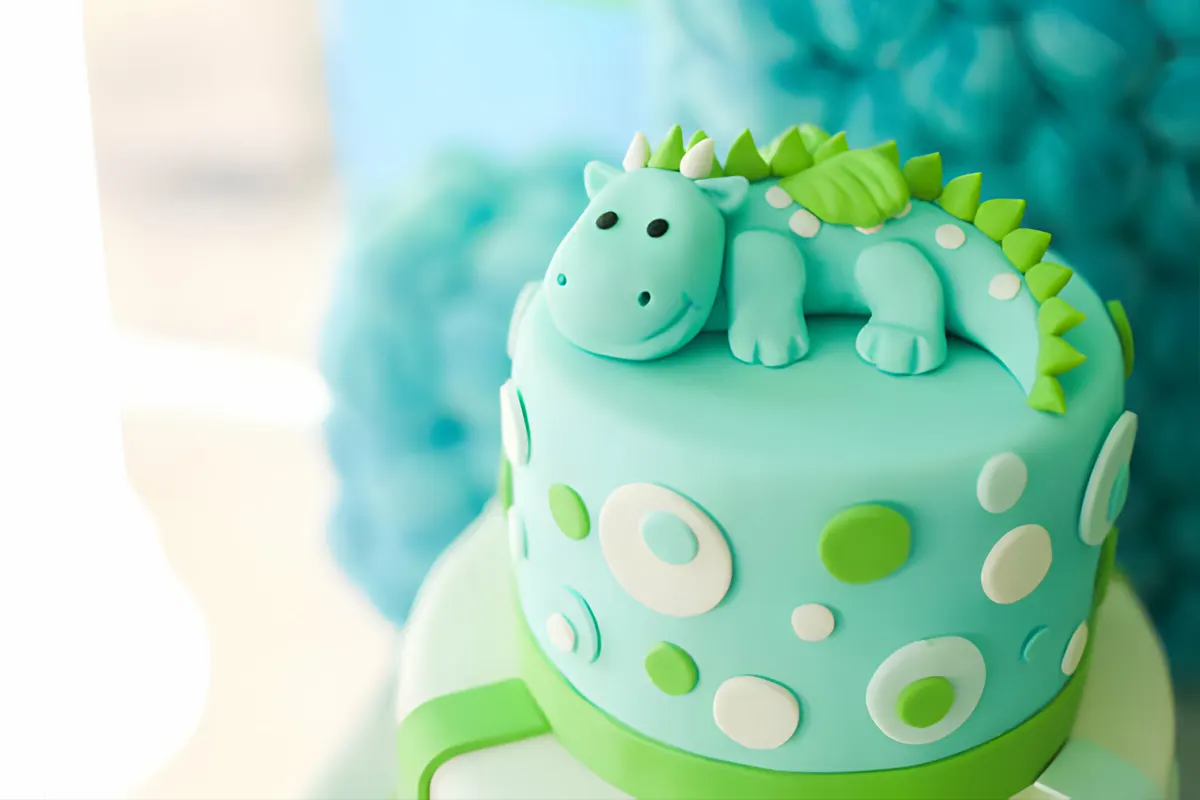
Imagine a towering cake shaped like a T-Rex or a playful creation adorned with miniature dinosaurs, dino footprints, and lush greenery. The exciting visual appeal of dinosaur cakes draws in guests, while their scrumptious taste keeps everyone coming back for more. As we venture deeper into the world of baking, you'll discover a range of options – from intricate fondant designs to simple yet effective decorations that even novice bakers can tackle. This blog post will explore a variety of delightful Dinosaur Cake ideas, step-by-step decorating techniques, and tips for achieving that jaw-dropping look without the need for professional skills.
Whether you're on a quest for inspiration or practical guidance to whip up your very own Dinosaur Cake masterpiece, you'll learn how to create a visually stunning product that will impress guests and delight the taste buds. Plus, we'll highlight the essential tools and ingredients to have on hand, ensuring that your baking experience is not only enjoyable but also manageable. So, grab your apron and get ready to embark on a dino-riffic adventure that combines creativity and culinary skill in one delicious package! By the end of this post, you will be fully equipped to bake a dinosaur cake that will reign supreme at any celebration. Let's make every celebration unforgettable with a cake that roars with flavor and fun!
Section 1: Choosing the Right Cake Recipe
When embarking on the adventure of baking a dinosaur-themed cake, choosing the right cake recipe is crucial to ensure taste and appearance align with your creative vision. There are various types of cake recipes to consider, each bringing its unique texture and flavor that can complement your dino design perfectly.
Classic Vanilla Cake
A timeless choice, classic vanilla cake provides a neutral yet delicious base. The light, fluffy texture allows for easy stacking and decorating. To make this cake truly stand out, consider infusing it with a hint of almond extract or incorporating colorful sprinkles to mimic dinosaur eggs.Chocolate Cake
For chocolate lovers, a rich chocolate cake can serve as the perfect backdrop for a vibrant dinosaur décor. This moist and decadent option is always a crowd-pleaser. Using dark cocoa powder can enhance the flavor, while a ganache drizzle can add a glossy finish.Carrot Cake
As a healthier alternative, carrot cake offers a moist texture and rich flavor profile. Adding crushed pineapple or walnuts can enhance the cake's personality, giving it a delicious crunch. Decorate this cake with a cream cheese frosting, allowing for green food coloring to simulate grass.
- Funfetti Cake
To add a whimsical touch, consider a funfetti cake filled with colorful sprinkles. This recipe is visually appealing, especially for children's birthday parties. The vibrant colors of the funfetti complement the vibrant decorations of dinosaurs, creating a joyful atmosphere.
Ultimately, the best cake recipe aligns with your taste preference and the party theme. Don't shy away from experimenting by combining flavors or textures. For an enhanced cake experience, test your chosen recipe before the big day to ensure perfect layers and flavors. Using high-quality ingredients and proper baking techniques can take your dinosaur cake from ordinary to extraordinary.
Section 2: Decorating Your Dinosaur Cake
Transforming your cake into a captivating dinosaur masterpiece requires creativity and the right decorating techniques. Here, we’ll explore a few ideas to help you create an eye-catching dinosaur cake that will leave guests awestruck.
Dinosaur Figurines
A simple yet effective way to bring your cake to life is by employing plastic dinosaur figurines as part of the decor. Place these miniatures strategically on top of the cake or around its base to create a prehistoric scene. Opt for dinosaurs of various colors and sizes for an eye-catching effect.Buttercream Sculpting
Utilizing buttercream in different colors not only adds flavor but also serves as a medium for sculpting. Create textured scales by employing a star tip on the sides of the cake. Use green buttercream for the base and add darker hues for shadows to create depth. Incorporating sharp edges can simulate a dinosaur's spikes or back ridges.Fondant Decorations
Fondant is perfect for precise detailing. Roll out fondant, cut it into fun shapes such as footprints or dinosaur tails, and adhere them to the cake with edible glue. Craft detailed dinosaur shapes for added flair, and consider using edible glitter to give it a magical touch.
Edible Crayons and Cake Topper
For an easy and fun twist, use edible crayons to draw fun patterns on a white frosted cake. You can also utilize a custom cake topper featuring Jurassic illustrations or phrases like "Stomp" to enhance the theme.Natural Elements
Incorporate elements like crushed graham crackers to resemble a sandy desert and use green candy melts to mimic leaves or trees around your cake. Adding these touches creates an immersive dinosaur world that elevates your dessert.
Combining these decorating ideas ensures that your dinosaur cake not only tastes delightful but also wows your guests, making it the star of the party!
Section 3: Tips for Hosting a Dinosaur-Themed Party
Hosting a dinosaur-themed party can be an exciting adventure that captivates children and adults alike. Incorporating fun and creative elements can elevate the celebration from ordinary to extraordinary. Here are some valuable tips to help you plan a roaring good dinosaur bash!
1. Invitations
Begin by setting the tone with dinosaur-themed invitations. Opt for vibrant designs featuring popular dinosaur species like the T-rex or triceratops. You can create DIY invitations that resemble dinosaur footprints or use online platforms to customize fun illustrations. Include clever wording such as "Join us for a dino-mite celebration!" to pique guests’ interest.
2. Decorations
Create an immersive dino-world with decorations that transport your guests back to prehistoric times. Use green, brown, and vibrant colored balloons to mimic the jungle environment. Scatter dinosaur figurines around the venue and set up a backdrop with a dinosaur scene where guests can take pictures. Don’t forget to hang paper vines and leaves to enhance the ambiance even further.
3. Themed Activities
Plan engaging activities that keep the little ones entertained. A dinosaur egg hunt is a classic; use plastic eggs filled with small dinosaur toys or candies. Another fun activity is a “Dino Dig” where kids can excavate toy dinosaurs from a sandbox filled with sand or dirt. Make dinosaur crafts, such as creating dino masks or decorating paper plates to resemble different dinosaur species.
4. Dinosaur Cake and Treats
No dinosaur party is complete without a spectacular dino cake! Opt for a cake decorated to look like a stegosaurus or a jurassic landscape. Pair the cake with themed treats like dinosaur-shaped cookies or cupcakes adorned with edible dinosaurs. You can even offer "fossil" cookies made from chocolate dough, making every bite a tasty discovery.
5. Party Favors
Send guests home on a high note with dinosaur-themed party favors. Consider giving away small dinosaur figurines, dinosaur-themed coloring books, or even personalized bags filled with jelly beans in the shape of dino eggs. These party favors will remind your guests of the fun-filled day they had.
By incorporating these tips, your dinosaur-themed party is sure to be a memorable experience for everyone involved!

Dinosaur Cake: Fun Ideas for Any Celebration - RecipeStrip
Equipment
- Mixing bowl
- Cake pan
- Oven
- Cooling rack
- Decorating tools
Ingredients
Cake Ingredients
- 250 g All-purpose flour
- 200 g Sugar
- 120 ml Milk
- 100 g Butter
- 3 Large eggs
Decoration Ingredients
- 200 g Fondant (green and brown)
- 150 g Buttercream frosting
Instructions
- Preheat the oven to 180°C (350°F) and grease the cake pan.
- In a mixing bowl, cream together the sugar and butter until light and fluffy.
- Add the eggs one at a time, beating well after each addition.
- Gradually mix in flour and milk until the batter is smooth.
- Pour the batter into the prepared cake pan and bake for 60 minutes.
- Let the cake cool completely on a rack before frosting.
- Cover the cake with buttercream frosting and decorate using fondant to create dinosaurs.
- Slice and serve your dinosaur cake at the celebration!
Notes
Can I use gluten-free flour for this cake?
Yes, you can substitute regular flour with a gluten-free blend for a gluten-free dinosaur cake.
What’s the best way to store leftover cake?
Store the leftover cake in an airtight container in the refrigerator for up to 3 days.
Can I customize the flavor of the cake?
Absolutely! You can use vanilla, chocolate, or even lemon cake mixes for a fun twist.
Conclusion
In summary, a dinosaur-themed party is an exciting way to celebrate and engage children with captivating activities, colorful decorations, and a standout dinosaur cake. The cake itself serves as the centerpiece of the event, featuring creative designs that echo the vibrant, prehistoric theme. Whether through dinosaur-inspired treats, engaging games, or playful invitations, the emphasis on imaginative details sets the tone for a memorable celebration.
Don’t forget that preparation is key; planning ahead ensures you can create an unforgettable experience for your guests. Remember to make the cake the star of the show and consider personal touches that can incorporate the guest of honor's favorite dinosaur or color.
Ready to make your next party a dino-mite success? Start prepping today, and don't hesitate to share your dinosaur-themed creations and experiences!
